[素材有]CSS+画像で作るスマートフォン向けラジオボタン&チェックボックス

こんにちは、霙(@xxmiz0rexx)です。
漂う今更感の中、スマートフォンでタップしやすい形のラジオボタンとチェックボックスを作る機会があったのでメモとして残しておきます。
ON/OFFの画像も作ったので、もし使いたい人がいたらご自由にダウンロードしてくださいませ :)
ゴール

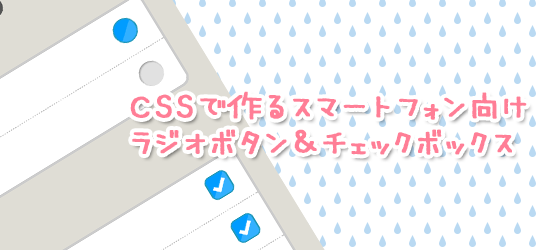
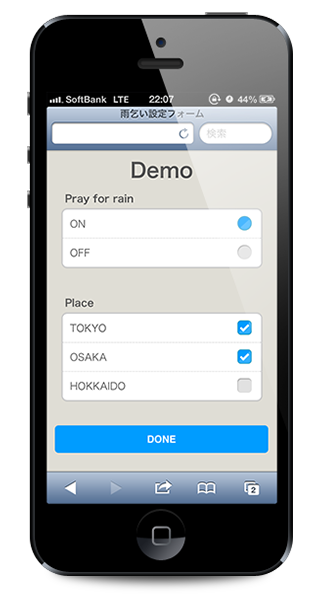
今回目指したのはこんなイメージ。
デフォルトのチェックボックス&ラジオボタンを使ってみた結果、タップ範囲が狭く選択しづらかったので
iOSアプリのように押しやすいUIにしたいと思い、CSS&画像で作ってみました。
これなら横一列がタップ範囲なので不器用なわたしでも押し間違いをしたり「何これ押せない…!」なんてことが発生しにくく、非常に快適に使うことが出来ました♪
記述方法
今回はじめてfieldsetタグとlegendタグを使ってみました(WEBCRE8の@glatyouさん監修w)
html
<form id="infoForm">
	<fieldset>
		<legend>Pray for rain</legend>
		<ul class="list_view">
			<li><input type="radio" name="test1" id="on" checked><label for="on">ON</label></li>
			<li><input type="radio" name="test1" id="off"><label for="off">OFF</label></li>
		</ul>
	</fieldset>

	<fieldset>
		<legend>Place</legend>
		<ul class="list_view">
			<li><input type="checkbox" name="test2" id="tokyo" checked><label for="tokyo">TOKYO</label></li>
			<li><input type="checkbox" name="test2" id="osaka" checked><label for="osaka">OSAKA</label></li>
			<li><input type="checkbox" name="test2" id="hokkaido"><label for="hokkaido">HOKKAIDO</label></li>
		</ul>
	</fieldset>
	<button type="submit" class="save_button">DONE</button>
</form>
css
* {
    -webkit-box-sizing: border-box;
       -moz-box-sizing: border-box;
         -o-box-sizing: border-box;
        -ms-box-sizing: border-box;
            box-sizing: border-box;
}

fieldset{
    border:none;
}

legend{
    padding:5px 5px 0;
    font-weight: bold;
}

#infoForm ul{
    list-style: none;
    margin: 0 auto 25px;
    padding: 0;
    background: #fff;
    border-radius: 8px;
    border: 2px solid #ccc;
}

#infoForm ul li{
    padding: 0;
    margin: 0;
    position: relative;
}

#infoForm input{
    position: absolute;
    top:-5px;
    width: 100%;
}

/*ラジオボタン*/
#infoForm input[type="radio"]{
    opacity : 0;
    width: 100%;
    height: 100%;
    padding: 0;
}

#infoForm input[type="radio"] + label{
    display: block;
    background: URL(radio_off.png) no-repeat 98% center;
    background-size: 35px;
    border-bottom: 1px dotted #ccc;
    padding: 10px 20px 10px 10px;
    color: #555;
    text-decoration: none;
}

#infoForm input[type="radio"]:checked + label{
    background: URL(radio_on.png) no-repeat 98% center;
    background-size: 35px;
}


/*チェックボックス*/
#infoForm input[type="checkbox"]{
    opacity : 0;
    width: 100%;
    height: 100%;
    padding: 0;
}

#infoForm input[type="checkbox"] + label{
    display: block;
    background: URL(check_off.png) no-repeat 98% center;
    background-size: 35px;
    border-bottom: 1px dotted #ccc;
    padding: 10px 20px 10px 10px;
    color: #555;
    text-decoration: none;
}

#infoForm input[type="checkbox"]:checked + label{
    background: URL(check_on.png) no-repeat 98% center;
    background-size: 35px;
}

#infoForm li:last-child label{
    border-bottom:none;
}
画像を差し替える場合はピンク文字の箇所を書き換えてくださいませ。
Demoページ
これだけじゃわかりにくいと思うので、一応Demoページを作ってみました。スマートフォンからも見てみてくださいね :)
ラジオボタン・チェックボックス画像
今回使用した何の変哲もない画像を使いたい方は以下からどうぞ。MITライセンスです。
ちなみに、わたしが思うフラットデザインのイメージで作りましたよw(あってんのかな・・)
androidでチェックボックスにチェックが入らない時
先日、androidでどうしてもうまく行かなくて死にかけてたんですが、
くまなく確認をしてみたら<label for=”●●”>を間違って指定していました。
<input id=”●●”>の●●を指定するのが正解ですね。iPhoneでは何の問題もなかったので「またお前か!!!!」と思ってたら完全に私のせいでした/(^o^)\
フォーム周り、普段全然関わらないので凡ミスが多い・・疑ってごめんねAndroidくん・・・w
さいごに
今や画像を使わずcssだけで作ることもできるみたいですね。
参考:スマートフォンでチェックボックスやラジオボタンを使いやすくする (その2) | BALLOG
Androidでは多少ギザギザしてしまう場合もあるようですが、
最新の端末なら結構キレイみたいですよ。すごい時代ですね。
以上、霙でした。
みぞれーめもめも

代々木公園にお散歩に行ったら、薔薇が咲いていました!ピンクの薔薇きゃわきゃわ♪
ところで、私達の他にもいろんなひとが花を撮っていたわけですが、なぜか女の人と薔薇の花を一緒に撮るひとはみんな必ず黄色い薔薇をチョイスしておりました。不思議や・・肌がキレイに写るのかな…?
この記事がお役に立ったら
いいね!お願いしまっす
(*´∨`*)
この記事を書いたみぞれしはTwitterをやっています
Follow @xxmiz0rexx
